Jell-O pudding mix offers a delightful, convenient path to creamy desserts, enhancing everyday treats with vibrant color and flavor – a true pantry staple!
From classic banana pudding to no-bake pies, this versatile mix elevates recipes, bringing a touch of bliss with its simple preparation and delicious results.
Jell-O’s history is rooted in innovation, evolving from gelatin desserts to the beloved pudding mixes enjoyed today, consistently delivering sweet satisfaction for generations.
What is Jell-O Pudding Mix?
Jell-O Pudding Mix is a powdered blend designed to create smooth, creamy pudding with the addition of milk. It’s a convenient shortcut to a classic dessert, offering a delightful experience with minimal effort. This pantry staple contains modified food starch, sugar, cocoa (in chocolate varieties), and artificial flavors, all carefully balanced to deliver that signature Jell-O taste.
Unlike traditional custard-based puddings, Jell-O relies on starch thickening, resulting in a quicker preparation time. It’s available in both instant and cook & serve varieties, catering to different preferences and time constraints. The mix’s versatility extends beyond simple pudding; it’s a secret ingredient in pies, parfaits, and even baked goods, adding moisture and flavor to a wide range of treats. It truly is a versatile dessert component!
Brief History of Jell-O
Jell-O’s origins trace back to 1897 with Pearle Wait and his wife May, who patented a gelatin dessert. Initially marketed as “Gelatin Dessert,” it required consumers to supply their own flavoring. In 1925, the name officially changed to Jell-O, and pre-flavored varieties emerged, revolutionizing dessert preparation.
The introduction of pudding mixes followed, expanding Jell-O’s reach beyond wobbly gelatin molds. These mixes offered a creamy alternative, capitalizing on the brand’s established trust and convenience. Throughout the 20th century, Jell-O became a cultural icon, featured in countless recipes and advertisements. Today, it continues to innovate, offering sugar-free options and diverse flavors, remaining a beloved household name.
Understanding Different Types of Jell-O Pudding Mix
Jell-O offers both instant and cook & serve pudding mixes, alongside a wide array of flavors and dietary options to suit every preference and need.
Instant Pudding vs. Cook & Serve
Instant pudding mix delivers convenience, requiring only cold milk for a quick, chilled dessert – perfect for spontaneous cravings or time-sensitive situations. It sets rapidly, offering immediate gratification without stovetop heating.
Cook & serve pudding, conversely, involves heating milk and the pudding mix on the stovetop, resulting in a richer, more traditional pudding texture. This method allows for greater control over consistency and a slightly more nuanced flavor profile.
While both types utilize similar ingredients, the processing differs. Instant pudding contains pre-cooked starch, eliminating the need for heating, while cook & serve relies on starch granules that gelatinize during the cooking process. Choosing between them depends on your desired convenience and texture preference.
Flavor Varieties Available
Jell-O pudding mix boasts an extensive array of flavors, catering to diverse palates. Classic choices like vanilla, chocolate, and strawberry remain perennial favorites, providing a comforting base for countless desserts.
Beyond the staples, adventurous options abound, including pistachio, butterscotch, cheesecake, and white chocolate. Seasonal and limited-edition flavors frequently emerge, adding excitement and novelty to the product line.
These diverse flavors aren’t limited to standalone puddings; they seamlessly integrate into pies, parfaits, and baked goods, enhancing their taste profiles. The vibrant colors associated with each flavor also contribute to visually appealing creations, making dessert even more enjoyable.
Sugar-Free and Other Dietary Options
Jell-O recognizes the growing demand for dietary alternatives, offering sugar-free pudding mixes for those managing their sugar intake. These options utilize artificial sweeteners to deliver the familiar creamy texture and beloved flavors without the added sugar.
Furthermore, Jell-O provides options catering to specific needs, though availability may vary. While not extensive, consumers can find mixes suitable for gluten-free diets, though careful label reading is always recommended to confirm ingredients.
It’s important to note that ingredient lists can change, so individuals with allergies or strict dietary requirements should always verify the composition of each product before consumption, ensuring a safe and enjoyable experience.
Basic Pudding Preparation: Cook & Serve Method
Cook & Serve pudding offers a richer, more traditional texture, requiring stovetop heating with milk for a deliciously creamy result – a classic dessert experience!
Ingredients Needed
For a classic Cook & Serve pudding, you’ll require just a few simple ingredients readily available in most kitchens. Naturally, you’ll need one 3.4-ounce package of your favorite Jell-O Pudding Mix flavor – chocolate, vanilla, or butterscotch are popular choices!
Next, you’ll need 2 ½ cups of cold milk; whole milk will yield the richest, creamiest pudding, but 2% or even skim milk can be used for a lighter option. A pinch of salt is also recommended to enhance the flavors.
Finally, while optional, a tablespoon of butter or margarine can be added for an extra layer of smoothness and a subtle, luxurious sheen to your finished pudding. These basic components combine to create a comforting and delightful dessert.
Step-by-Step Instructions for Cook & Serve
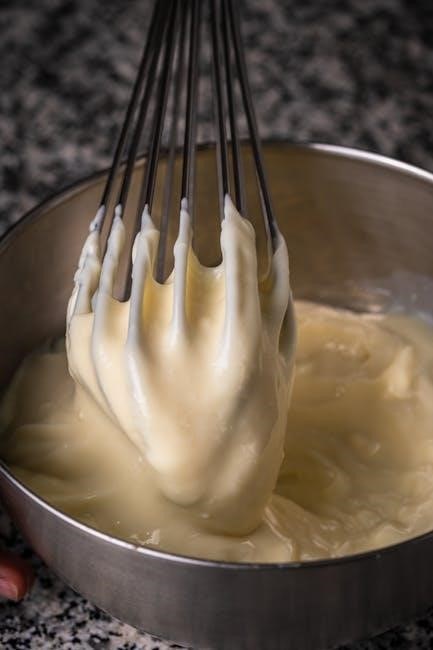
Begin by whisking together the Jell-O Pudding Mix and ¼ cup of cold milk in a medium saucepan until smooth. This prevents lumps from forming during the cooking process. Then, gradually add the remaining 2 ¼ cups of milk, whisking constantly to ensure everything is well combined.
Place the saucepan over medium heat and cook, stirring continuously, until the mixture comes to a full boil. Once boiling, reduce the heat to low and continue to cook, stirring for 2 minutes. Remove from heat and stir in the optional butter or margarine.
Pour the pudding into individual serving dishes or a large bowl. Cover with plastic wrap, pressing it directly onto the surface to prevent a skin from forming. Refrigerate for at least 4 hours, or until fully set.
Troubleshooting Cook & Serve Pudding
If your pudding is too thin, it likely didn’t cook long enough. Return it to low heat and continue stirring for an additional minute or two, ensuring a full boil is maintained during the initial cooking phase. Conversely, if it’s too thick, you may have overcooked it – unfortunately, there’s little remedy for this.
Lumps can occur if the dry mix isn’t thoroughly whisked with the initial cold milk. Ensure a smooth paste forms before adding the remaining milk. A skin forming on top is easily avoided by pressing plastic wrap directly onto the pudding’s surface while cooling.
For a richer flavor, consider adding a tablespoon of butter or margarine after removing from heat.

Basic Pudding Preparation: Instant Method
Instant pudding delivers a quick, creamy dessert! Simply combine the mix with cold milk, whisk vigorously for two minutes, and chill for a delightful treat.
For the instant pudding method, gathering your ingredients is remarkably straightforward. You’ll require one 3.4-ounce package of your preferred Jell-O pudding mix flavor – chocolate, vanilla, or strawberry are popular choices! The liquid component is equally simple: precisely 2 cups (480ml) of cold milk.
While the recipe traditionally calls for dairy milk, feel free to experiment with alternatives like almond milk or oat milk for a different twist. However, remember that using different milk types might slightly alter the final texture and flavor. No additional sugar is typically needed, as the pudding mix is pre-sweetened, but a dash of vanilla extract can enhance the overall taste if desired.
Step-by-Step Instructions for Instant Pudding
Creating instant pudding is wonderfully easy! Begin by pouring the 2 cups of cold milk into a medium-sized mixing bowl. Next, add the entire 3.4-ounce package of Jell-O pudding mix to the milk. Whisk vigorously for approximately two minutes, ensuring all the powder is fully dissolved and no lumps remain.
The mixture will initially appear quite liquid, but don’t worry – this is perfectly normal! Continue whisking, and within about five minutes, the pudding will begin to thicken to a delightfully creamy consistency. Once thickened, gently spoon the pudding into individual serving dishes or one larger bowl. Cover and refrigerate for at least 30 minutes to allow it to fully set.
Tips for Perfectly Smooth Instant Pudding
Achieving flawlessly smooth instant pudding hinges on a few key techniques. Firstly, ensure your milk is thoroughly cold; this aids in proper thickening. Secondly, whisk consistently and vigorously for the full two minutes – don’t rush this step! If minor lumps persist, try straining the mixture through a fine-mesh sieve.
For an extra luxurious texture, consider using whole milk instead of skim. Avoid over-whisking, as this can sometimes lead to a slightly grainy texture. Finally, allow sufficient chilling time – at least 30 minutes – for the pudding to fully set and reach its optimal creamy consistency.

Beyond Basic Pudding: Creative Uses
Jell-O pudding mix isn’t limited to simple cups! It’s a secret weapon for pies, no-bake desserts, and layered parfaits, adding creamy texture and flavor.
Elevate treats with this versatile ingredient, creating delightful desserts that are both easy and incredibly satisfying for any occasion.
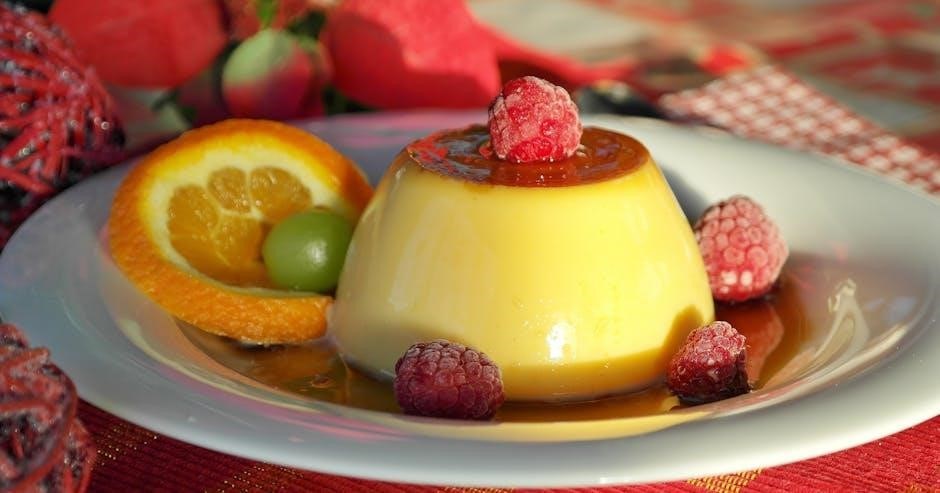
Pudding as a Pie Filling
Utilizing Jell-O pudding mix as a pie filling offers a remarkably simple and delicious alternative to traditional methods. Forget lengthy custard preparations; a box of pudding mix, combined with milk, creates a creamy, flavorful base for your favorite pies.
This technique works exceptionally well for classics like banana cream pie or chocolate pie, providing a consistent texture and vibrant flavor. Simply prepare the pudding according to package directions, then pour it into a pre-baked pie crust.
Top with whipped cream, fresh fruit, or chocolate shavings for an elegant and effortless dessert. The pudding sets beautifully, offering a smooth and satisfying slice every time. It’s a fantastic shortcut for busy bakers!
Pudding in No-Bake Desserts
Jell-O pudding mix truly shines in the realm of no-bake desserts, offering a quick and easy route to creamy, indulgent treats. Its convenience eliminates the need for oven time, making it perfect for warm weather or when you simply crave something sweet without the fuss.
Combine prepared pudding with crushed cookies, whipped topping, and layers of fruit for effortless parfaits or trifle-style desserts. The pudding acts as a binding agent, holding everything together beautifully.
Consider a no-bake cheesecake using pudding mix for a simplified recipe, or create individual pudding cups with various toppings. The possibilities are endless, and the results are consistently delicious and satisfying!
Pudding Parfaits and Layered Desserts
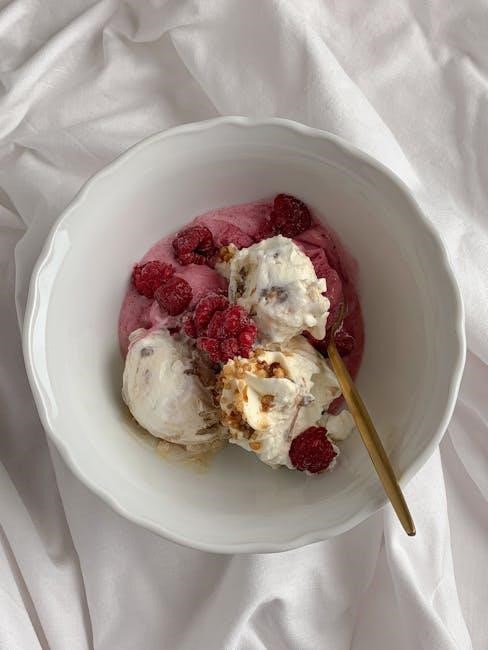
Jell-O pudding mix is a star player when crafting stunning pudding parfaits and layered desserts, adding both flavor and a beautiful creamy texture. The vibrant colors of different pudding flavors create visually appealing layers in a glass.
Alternate layers of prepared pudding with crushed cookies, fresh berries, whipped cream, or even crumbled brownies for a delightful contrast in textures and tastes. These desserts require no baking, making them incredibly simple to assemble.
Experiment with different flavor combinations to create unique and personalized treats. Parfaits are perfect for parties or a simple, elegant dessert any day of the week!
Jell-O Pudding Pops
Jell-O pudding pops evoke nostalgic joy! Easily made with prepared pudding, frozen in molds, they offer a cool, creamy treat – a delightful, simple pleasure.
These pops bring back cherished memories, providing a refreshing escape, especially on warm days, and are a fun activity to enjoy with family.
Ingredients for Jell-O Pudding Pops
To create these delightful frozen treats, you’ll need a few simple ingredients readily available in most kitchens. First, 3oz package of your favorite Jell-O pudding mix is essential – choose any flavor to customize your pops!
Next, you’ll require 2 cups of cold milk; this forms the base of your creamy pudding. For a richer texture, whole milk is recommended, but any milk type will work.
Finally, you’ll need popsicle molds and popsicle sticks. The molds determine the shape of your pops, while the sticks provide a convenient handle. Consider using silicone molds for easy removal.
Optional additions include fresh fruit for a burst of flavor and texture, or even a swirl of whipped cream before freezing for an extra indulgent treat!
Instructions for Making Jell-O Pudding Pops
Begin by whisking together the pudding mix and cold milk in a medium bowl for approximately two minutes, until the mixture begins to thicken. Ensure all lumps are dissolved for a smooth consistency.
Next, carefully pour the pudding mixture into your popsicle molds, leaving a small space at the top for expansion during freezing. If adding fruit, gently distribute it throughout the molds.
Insert popsicle sticks into the center of each mold, ensuring they stand upright. Cover the molds with plastic wrap and freeze for at least four hours, or preferably overnight, until completely solid.
To release the pops, briefly run the molds under warm water. Gently pull on the sticks to remove the frozen treats and enjoy!
Variations on Jell-O Pudding Pops
Elevate your pudding pops by layering different flavored puddings within a single mold for a vibrant, multi-colored treat. Incorporate crushed cookies or graham crackers between layers for added texture and flavor.
Fresh fruit, like berries or sliced bananas, adds a natural sweetness and visual appeal. Swirl in a ribbon of melted chocolate or peanut butter before freezing for a decadent touch.
For a creamsicle-inspired pop, alternate layers of vanilla pudding and orange Jell-O. Experiment with adding a splash of fruit juice to the pudding mix for a unique twist.
Don’t hesitate to get creative – the possibilities are endless when crafting your personalized Jell-O pudding pops!

Jell-O Pudding in Baking
Pudding mix is a secret weapon for moist, flavorful baked goods, from brownies to cakes, adding a creamy texture and delightful sweetness to every bite!
It’s a simple pantry staple that elevates classic recipes, creating incredibly tender brownies and cakes with a unique, satisfying finish.
Adding Pudding Mix to Brownies
Brownies truly reach perfection when enhanced with a touch of Jell-O pudding mix! This simple addition transforms ordinary brownies into incredibly moist and chewy delights, elevating them to a whole new level of deliciousness.
Typically, a standard 3.4-ounce box of instant pudding mix – any flavor complements chocolate beautifully – is incorporated directly into the brownie batter. It’s best to combine the pudding mix with the dry ingredients before adding the wet components, ensuring even distribution.
The pudding mix acts as a tenderizer, preventing the brownies from becoming overly dense or cakey. It also imparts a subtle, complementary flavor that enhances the overall taste experience. Whether you prefer frosting-topped or cosmic-sprinkled brownies, pudding mix is a game-changer!
Pudding Mix in Cakes for Moisture
Seeking incredibly moist and tender cakes? Jell-O pudding mix is your secret weapon! Adding a box of instant pudding to your cake batter guarantees a delightfully soft crumb and prevents dryness, resulting in a truly exceptional baking experience.
Similar to brownies, a 3.4-ounce box of pudding mix blends seamlessly with the dry ingredients before incorporating the wet components. Vanilla, chocolate, or even butterscotch pudding flavors can beautifully complement various cake recipes.
The pudding mix’s starches help retain moisture, creating a cake that stays fresh and flavorful for longer. This technique is particularly effective for cakes prone to drying out, ensuring a consistently perfect result every time you bake!
Pudding Frosting Recipes
Transform your cakes and cupcakes with a luscious, homemade frosting made surprisingly easy with Jell-O pudding mix! This simple addition creates a creamy, flavorful frosting that’s a delightful change from traditional buttercream.
Combine a box of instant pudding with softened butter, powdered sugar, and a splash of milk for a quick and delicious base. Experiment with different pudding flavors – chocolate, vanilla, or pistachio – to perfectly complement your cake.
For an extra touch, add a dash of vanilla extract or a sprinkle of salt to enhance the sweetness. This pudding-based frosting is not only easy to make but also incredibly versatile and satisfying!

Storage and Shelf Life
Unopened Jell-O pudding mix maintains its quality for an extended period, while prepared pudding should be refrigerated and consumed within a few days.
Proper storage ensures optimal flavor and texture, allowing you to enjoy this versatile dessert ingredient whenever inspiration strikes!
Storing Prepared Pudding
Proper storage is crucial for maintaining the delightful texture and flavor of your homemade Jell-O pudding. Immediately after preparation, transfer the pudding to an airtight container; this prevents the formation of a skin and minimizes odor absorption from other foods in the refrigerator.
Refrigerate the pudding promptly, ideally within two hours of making it, to inhibit bacterial growth. When stored correctly, prepared pudding generally remains fresh and safe to consume for 3 to 5 days. Always check for any signs of spoilage, such as an unusual odor or mold, before enjoying.
Individual portions can be stored in separate, smaller containers for added convenience and to prevent contamination after each serving. This is especially helpful for families or meal prepping!
Shelf Life of Unopened Mix
Unopened boxes of Jell-O pudding mix boast a surprisingly long shelf life, thanks to their dry, powdered form. Typically, these mixes remain perfectly usable for 18 to 24 months from the date of manufacture, as indicated on the packaging. However, quality may gradually decline over time, potentially affecting flavor intensity.
Proper storage is key to maximizing shelf life. Keep unopened boxes in a cool, dry pantry, away from direct sunlight, moisture, and strong odors. Avoid storing them near spices or other aromatic ingredients that could compromise the mix’s delicate flavor.
Check the “best by” date as a guideline, but the mix is often safe to use beyond this date, provided it’s been stored correctly and shows no signs of spoilage, like clumping or discoloration.

Nutritional Information
Jell-O pudding mix provides a sweet treat, but be mindful of sugar content. Typical values vary by flavor, so checking the package is essential for informed choices!
Typical Nutritional Values
Jell-O pudding mix, when prepared according to package directions (typically with milk), offers a relatively moderate caloric intake. A single serving (approximately 3.4 ounces) of vanilla instant pudding, for example, generally contains around 120-130 calories.
The carbohydrate content is usually around 24-26 grams, with a significant portion coming from added sugars – approximately 16-18 grams. Fat content is minimal, usually less than 1 gram per serving. Protein contributes around 2-3 grams.
It’s important to note these values can fluctuate slightly depending on the specific flavor and the type of milk used for preparation. Always refer to the nutritional information panel on the product packaging for the most accurate details regarding vitamins and minerals.
Considerations for Sugar Content
Jell-O pudding mixes traditionally contain a notable amount of added sugar, contributing significantly to the overall carbohydrate count per serving. This is a key consideration for individuals monitoring their sugar intake, such as those with diabetes or following a low-sugar diet.
Fortunately, Jell-O offers sugar-free pudding mix options utilizing artificial sweeteners. These alternatives provide a similar taste and texture with a drastically reduced sugar content, often containing less than 2 grams of sugar per serving.
When preparing pudding, consider using unsweetened milk alternatives like almond or soy milk to further minimize sugar levels. Always compare nutritional labels to make informed choices aligning with your dietary needs and preferences.

Frequently Asked Questions
Common questions revolve around milk substitutions and achieving the perfect pudding consistency; adjustments are easily made for desired thickness and dietary preferences!
Don’t worry if your pudding seems too thin – simple fixes exist to ensure a delightfully creamy texture every single time you prepare it.
Can I substitute milk types?
Absolutely! Jell-O pudding mix is remarkably versatile when it comes to milk choices. While the box typically calls for dairy milk, you can successfully use alternatives to cater to dietary needs or preferences.
Many bakers have found excellent results with almond milk, soy milk, oat milk, or even coconut milk. Keep in mind that using non-dairy milks may slightly alter the final flavor and texture of the pudding, potentially resulting in a less rich or creamy consistency.
For the best outcome, opt for unsweetened varieties of plant-based milks to avoid excessive sweetness. Experimenting with different milk types is encouraged to discover your favorite combination!
What if my pudding is too thin?
Don’t worry! A common issue with homemade pudding is achieving the desired thickness. If your Jell-O pudding appears too thin after the initial chilling period, there are a few simple solutions to remedy the situation.
You can try whisking in an additional tablespoon of pudding mix, ensuring it’s fully incorporated. Alternatively, gently heat a tablespoon of milk, mix it with a teaspoon of cornstarch, and whisk this slurry into the pudding.
Allow the pudding to chill for another 30 minutes to an hour after making adjustments. Patience is key – the pudding will firm up as it cools!